NativeScript Preview
There is a new command in the NativeScript CLI, which is going to change the way you work on your projects.
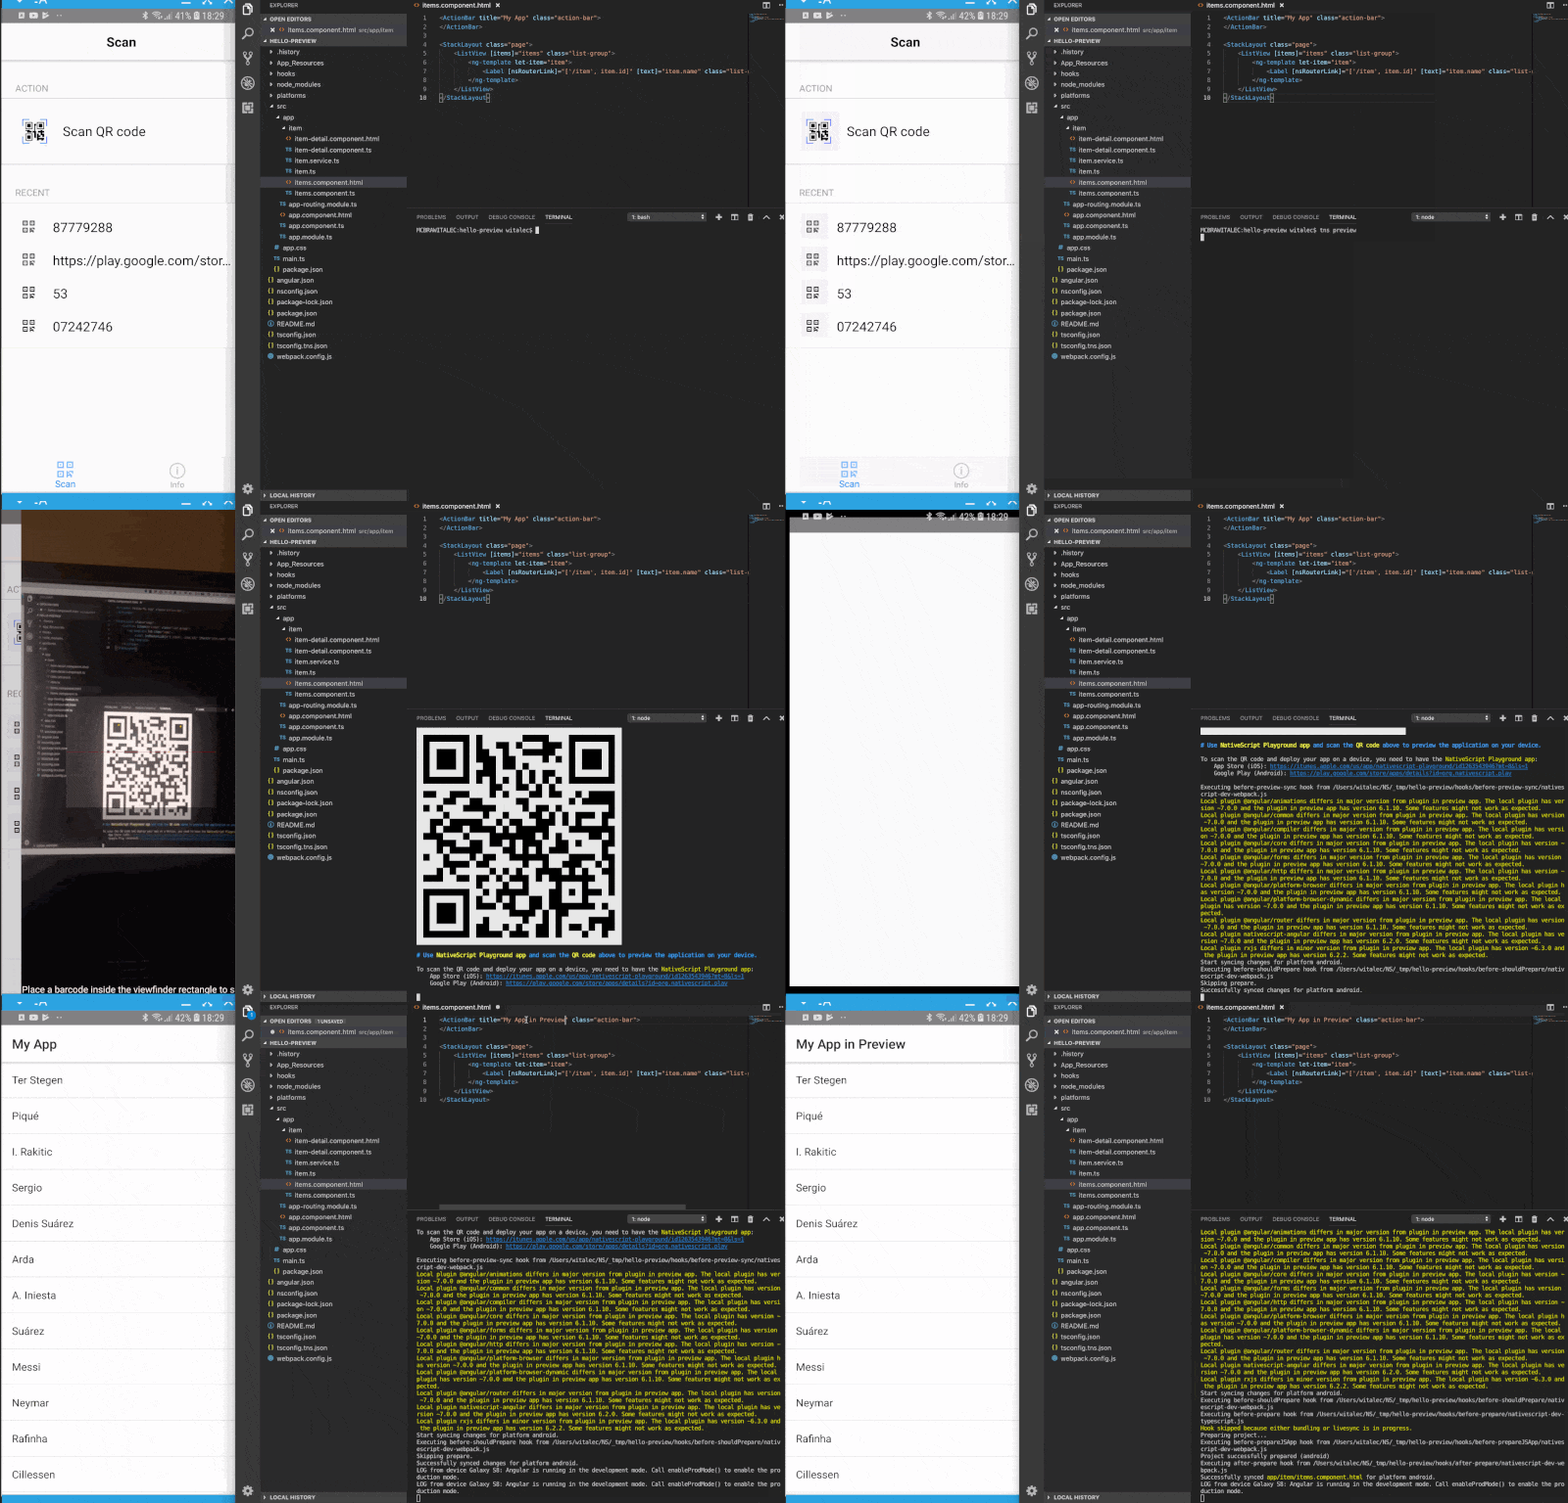
When you run tns preview from your NativeScript project, you will be presented with a QR Code. Scan the QR Code with the NativeScript Preview app, and your app will be launched in the NativeScript Preview app.
Then each time you make changes to the project, the app will be automatically updated and refreshed.

I want it, and I want it now - aka setup
You are probably asking yourself:
"What do I need to conjure this black magic on my machine?"
The truth is, that not much at all. If you have node installed on your machine, you can be ready in less than 5 minutes.
The NativeScript CLI
You need is to install the NativeScript CLI version 5.0 or newer.
npm install -g nativescriptCompanion apps
You will also need the companion apps:
- NativeScript Playground - used to scan the QR codes:
- NativeScript Preview - used to display your app:
Native Build tools - no thank you
There is no need to install the Android SDK nor Xcode. It won't hurt to have them installed (in case you decide to do a full build), but you don't need them to preview your apps.
Yes, you have read it right, tns preview allows you to test your apps without having to go through the full build process.
iOS preview from Windows or Linux
To make it even better you can also run the tns preview command from a Windows or Linux machine and preview the app on an iOS device 🤯.

How does it work?
Without getting into too many details.
The NativeScript Preview app works as a container app, which is used to display your app.
When you run the tns preview command and scan the QR code, the following happens:
- The NativeScript CLI checks the npm packages and provides you with a warning in case you use a library that is not supported or a different version of a supported library
- The CLI detects whether you scanned the code from an Android or an iOS device - this is important, so that the CLI knows whether to provide .android or .ios files
- The CLI prepares a bundle with your code and images, and sends it to the NativeScript Preview app
- The Preview app receives the bundle and replaces the current content with the bundled content
- The app is displayed in the Preview app
- The CLI will remain in a livesync mode - meaning every time you save changes to you project, the changes will be pushed
Note, that the Preview app will be blank between steps 1-4, as it takes a bit of time to prepare the initial bundle. However, each consecutive update should be a lot faster.
Options
There are a couple of different flags that you can pass with the tns preview command. Note that both are currently in Beta, as this is still a new feature that we constantly try to improve.
Webpack --bundle
The --bundle flag specifies that the Webpack bundler should be used to bundle the application.
In order to use Webpack in your project you need to have the nativescript-dev-webpack installed in your project.
Hot Module Replacement --hmr
The --hmr specifies that the Hot Module Replacement (HMR) should be used.
HMR uses Webpack to do its magic, so there is no need to add the --bundle flag.
You can learn more about HMR from Stanimira's blog.
Code-sharing projects
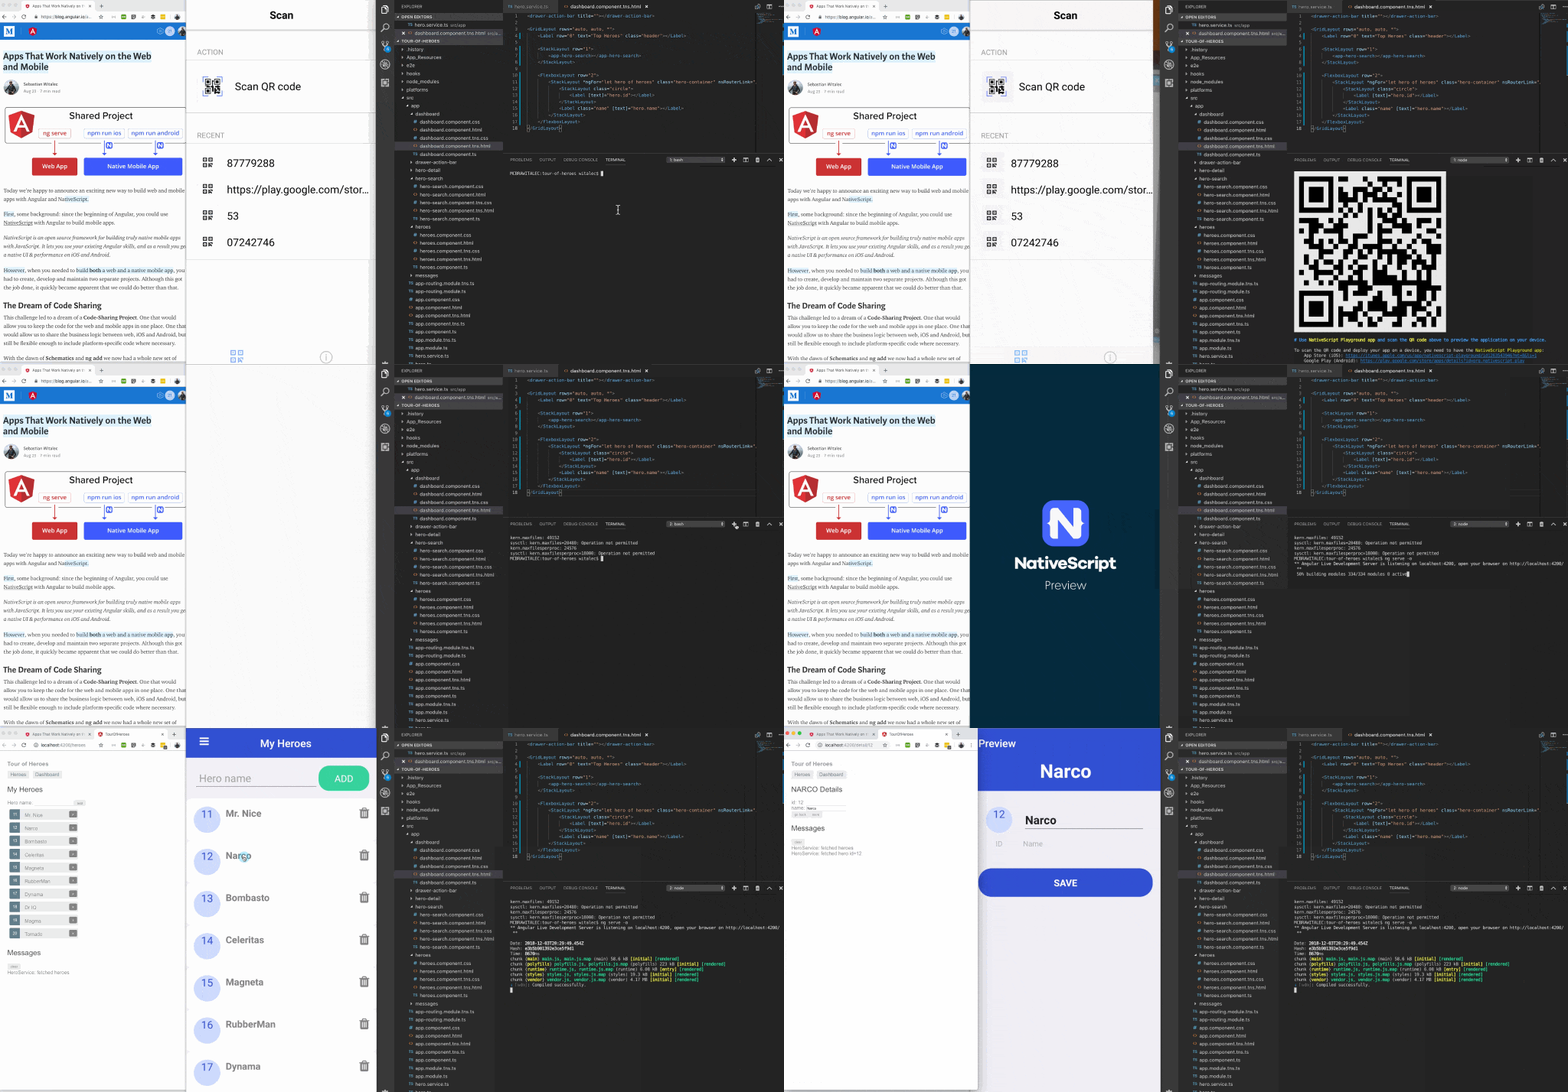
Personally, one of my favourite benefits of the preview workflow, is the fact that you can use it with code-sharing projects.
If you have a Schematics based code-sharing project, you can simply run ng serve to build a web app, and tns preview --bundle to build a mobile app.

You can learn more about code-sharing projects from my blogpost on angular.io and NativeScript docs.
You can try it yourself with the migrated tour-of-heroes project, here: tour-of-heroes/finished
Where is the catch?
Like with anything in the world, there are limitations on what can be done with the preview command.
Since, the preview command skips the step of building a native app, anything that would usually require rebuilding the native app is where the limitations are.
App Resources
App Resources are compiled into the app at build time.
Anything that goes into the App_Resources folder won't be available in the preview app.
Plugins
You can add any npm module library that doesn't contain any native iOS or Android binaries, like moment.js.
You cannot add any npm modules that contain native iOS and/or Android binaries, as this would require the native app to be rebuilt.
However, the NativeScript Preview app comes with a number of installed plugins, this includes all nativescript-ui-x plugins and more.
HINT: In order to get the list of included plugins, go to play.nativescript.org, press the QR code button, scan the QR code. Then go to the Devices tab and expand your device. This is where you will find a full list of the npm modules.
Android permissions
In Android, adding permissions requires you to make changes to the AndroidManifest.xml file. In order for those changes to take effect you need to recompile your native application. This cannot be done with the Preview app.
Publishing
In order to publish your apps, you still need to install the Android SDK and Xcode and then run tns build.
Alternatively, you could use NativeScript Sidekick to build your apps in the cloud. Yup, even iOS apps from a Windows/Linux machine.
Real devices only
The NativeScript Preview app is only available on real devices, as it needs to be downloaded from App Store or Google Play.
This means that you cannot use emulators with the preview workflow.
Reporting issues
Please, do not hesitate to share feedback or report any problems that you experience with the feature by opening a new issue in the: NativeScript CLI repository.
Final word
The preview workflow introduces a whole new way of building apps, and it changes the way you work with your NativeScript projects.
There is more than one way you can use it for your own benefit.
For me tns preview works really well for the workshops that I run. Now I can enter a room full of people new to NativeScript and 15 minutes later I have everyone with their first app up and running. That is including 10 minutes to connect to WiFi.
How are you going to use the preview workflow?
Share your feedback, thoughts and ideas in the comments below.